Hey everyone! I've been so busy lately. Please forgive me (and my jammed packed schedule). I have listed 2 cards on Etsy, and would love for you all to check them out. I also love video suggestions as I will soon be starting up my videos again! Thanks for your continued support!
PS: I can't wait for the holidays to start up, as I love holiday cards!
XOXO
Miranda
http://www.etsy.com/shop/MadeBuyMiranda
Saturday, October 1, 2011
Thursday, July 28, 2011
Christmas in July!
Hey everyone! I thought I'd post all of our Christmas with the Crafty Galz Videos from 2010. This is just a fun flashback for those who start early in making their yearly holiday cards, as well as those who weren't following/subscribed to craftygalz during the 2010 holiday season.
1.) Merry Christmas Card
2.) Fire Place Card
3.) Santa Card
4.) Peace & Joy card
5.) Joy Scrapbook Page
6.) Reindeer Card
7.) Handmade Gift Card Holder
8.) Snowflake Card
9.) Gingerbread Snowman Card
1.) Merry Christmas Card
2.) Fire Place Card
3.) Santa Card
4.) Peace & Joy card
5.) Joy Scrapbook Page
6.) Reindeer Card
7.) Handmade Gift Card Holder
8.) Snowflake Card
9.) Gingerbread Snowman Card
Monday, July 18, 2011
3 Flower Card
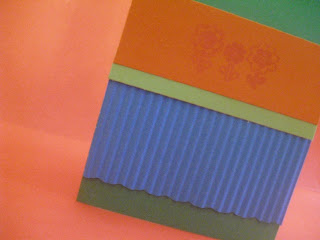
Hey Everyone! I have a quick card for you today. It is super simple (which of my cards aren't?), and only uses a card base and 3 scraps of cardstock (& a stamp with ink).
Friday, July 15, 2011
Scrapbook Area/Room Organization
Today I thought I'd share some of my ideas to organize a (small) scrapbook area (I have part of a room). I recently moved my 10 cart drawer (see it in this video, more specifically @ 10:40) out of my scrapbook area. This was alot of good space to organize, but I need it somewhere else now. Everything that was in that, now has to be organized other places throughout my scrapbooking area.
TIP: Use things that you'd normally throw away. Wash out the item & let it dry. Cover it with some cute patterned paper.
This is just a locker organizer. I thought it would be nice to organize some of my commonly used items. You can usually find these around this time of year.
This is a cereal box. I cut 3 sides off the front, so it will open and close. This houses all of my stickers.
This is a cocoa powder container. I covered it with some cute patterned paper. I kept the lid in case I ever want to put something different in it. Now, it houses my edge craft sizzors.
This came from either staples or office depot...can't remember. These are at the little stations where you can pick different types of paper clips and office supplies, After I used up all of the paper clips, I used it to store pens and pencils.
I got this a while back, they are frequently sold at the Target Dollar Spot. I thought I'd store my buttons in it, because I don't have a huge collection of buttons.
I LOVE this. I use it at a mini trash can for my desk. I covered it with some sparkly patterned paper. It helps my desk stay clean while I am working on big projects.
Tuesday, July 12, 2011
...More Simple Cricut Gifts
Hello Everyone! I know many of us may vacation over the summer and have family trips, or trips to visit distant (in space, not relation) relatives. I know many of us crafters (including me) love to make small personalized items for family members. This post also has ideas for easy Cricut gifts.
These are door signs, great for bedrooms. I kept it easy on myself and used the same 2 designs. It is much easier to work this way, you can cut out 2 of each image). I used 4x8 pieces of chipboard for each sign. On the girls' I added cream 4x8 cardstock, red letters, and a princess hat. On the boys' I added 4x8 bright blue cardstock, navy blue letters, and a alligator. (all paper by recollections @ Michael's, except princess hat [making memories-cosmopolitan stack])
I cut all of the letters out from George & Basic Shapes, I used 'shadow' for the letters. I think that chunky letters are cute.
I cut the Alligator from Create A Critter. A little hint to same some paper- Instead of cutting the (base) gator image in black and then cutting layer one in navy, I just cut the base in navy... not a huge deal to have navy eyes... that's all the black (base) is used for. This is the first time I have cut the Alligator; it is cute, but still boyish (sometimes I find Create A Critter can be a little cutesy for boy projects).
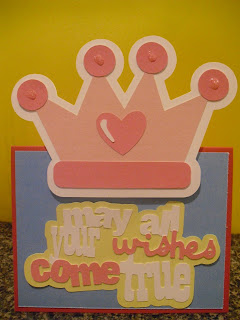
I LOVE this! I cut the princess hat out using the Sweet Treats cartridge. I used this same cut in this project. As you can see in the 2nd picture, I added cotton candy stickles to the heart on the princess hat, and xmas red stickles on the letters in small dots.
...GASP...that was a long post! Have a great day and stop back later for more crafty fun!
Wednesday, June 29, 2011
Wednesday, June 22, 2011
Stamped Lady Bug Card
Good Evening Everyone! I have been slaking on the tutorials (whats new? lol!) I really love making tutorials & the response I get from them, but the editing is what takes FOREVER, and causes me to slack. I have a few videos lined up, waiting to be edited, so be on the lookout for those. I also have a few SB layouts and other fun projects planned to be up within the next few weeks.
Cali's & My YouTube Birthday was yesterday! Two whole years of YouTube Tutorials? That's CRAZY! We are close to 200 Subscribers; which is AMAZING! Thanks to everyone who is subscribed to CraftyGalz and/or following my blog!
Today I have a video tutorial for a quick card. I used SCAL2 Software, but if you do not have SCAL2 or Cricut Design Studio (which would would using basic cartridges) a punch or circle cutter will do the same. I love this card. It turned out much better than I expected.
Today I have a video tutorial for a quick card. I used SCAL2 Software, but if you do not have SCAL2 or Cricut Design Studio (which would would using basic cartridges) a punch or circle cutter will do the same. I love this card. It turned out much better than I expected.
Thursday, June 2, 2011
Create A Critter Birdie Card
This is a super simple card using the Create a Critter Cricut cartridge. This would make a great birthday, thankyou, or hello card.
Sweet Treats Birthday Hat Card
Hey Everyone! Cali and I made a quick video today demonstrating how to make (a modified version of) the card in the Sweet Treats Handbook.
Friday, April 8, 2011
Pocket Card Series Episode Number 5.
Hey! Only 2 days left in this series :( I plan on filming a bunch of videos this weekend to upload throughout the next few weeks. Here is the card!
Thursday, April 7, 2011
Wednesday, April 6, 2011
Pocket Card Series Episode numero dos.
Hey everyone! Better late than never...right? Both Tuesday & Wednesday's Pocket card will be up tonight. Wednesday's is exporting from WindowsMovieMaker as I type. :)
Here is Tuesday's Card! Enjoy!
Here is Tuesday's Card! Enjoy!
Tuesday, April 5, 2011
Pocket Card Series: Episode #1- I Love You Card
Hey everyone! Long time, No see! I have been SLACKING! hahaha. So, today I have started a pocket card series. This will be 7 episodes long and last a week. "Monday" & "Tuesday" will be uploaded today, and then until next Monday it will be one a day. Hopefully that made sense. It makes sense in my head.
So any way, here is today's card!
So any way, here is today's card!
Saturday, March 12, 2011
Blue& Green Owl Card
Here is an easy card you can make in minutes!
Materials:
A2 Size Lime Green Cardstock
Blue Craft Tissue Paper
White Cardstock
Strip of Scrap Green Patterned Paper
Arrow Stamp
StudioG Owl Stamp
Green Pigment Ink
ZING! Embossing Powder in Aqua
Embossing Heat Tool
Blue Button
Green Thread
Tuesday, March 8, 2011
Thoughts & Prayers Card
Here is another video for you all. I think the colors are a little bright for a sympathy card, so next time, I would use softer earth tones.
Here is the screen shot I promised. I might do a tutorial of using basic shapes to make more complicated ones.
Here is the screen shot I promised. I might do a tutorial of using basic shapes to make more complicated ones.
Subscribe to:
Comments (Atom)


